
How to Laser Mark Steel: A Complete Guide
Introduction
Laser marking steel is a precise, durable, and often non‑destructive method for adding identification, logos, serial numbers, QR codes, or decorative marks to steel parts. Whether you’re working with mild steel, carbon steel, stainless steel, or tool steels, laser technology offers unmatched accuracy, speed, and durability. A proper understanding of laser types, process parameters, surface preparation, and post‑processing is vital.
In this guide, we’ll cover everything you need to know about laser marking steel—from choosing the right laser, to optimizing settings for different steel types, and ensuring long-lasting results. Whether you’re a manufacturer, hobbyist, or laser engraving business owner, this guide is for you.
What Is Laser Marking on Steel?
Laser marking is a non-contact process that uses a focused beam of light to alter the surface of steel. This can be done through various methods such as:
- Annealing (oxidizing the surface to create dark marks)
- Etching/engraving (removing material for deeper marks)
- Surface marking (minimal depth, high contrast)
- Carbon migration (used on stainless steel to create black marks)
Each method results in a permanent, high-resolution mark that resists wear, corrosion, and environmental damage.
Summary
- Laser type matters: Fiber or MOPA fiber lasers are preferred; CO₂ lasers need marking sprays for steel.
- Marking vs engraving vs annealing: Each approach has tradeoffs in depth, contrast, and material integrity.
- Surface prep and control of parameters are essential: cleaning, fixturing, gas, focus, speed, and power.
- Post‑processing (cleaning, coating) helps durability.
Understanding Laser Marking Mechanisms on Steel
Before diving into how to do it, it’s useful to understand why lasers can mark steel, and what methods are available.
1. Laser–Material Interaction Basics
Lasers deliver focused, high‑energy light which, when interacting with a material, can cause one or more of:
- Ablation / engraving / removal of material
- Thermal effects / annealing that induce color changes without removing material
- Bonding of additives (laser bonding) to the surface
Which mechanism dominates depends on the laser wavelength, pulse duration, energy density, and the steel’s properties.
2. Types of Lasers for Marking Steel
- Fiber / MOPA fiber lasers (e.g. ~1064 nm): These are the most commonly used lasers for steel marking. They can support annealing and some shallow engraving and are efficient at coupling energy into metal.
- Wavelength: ~1064 nm
- Ideal for: Stainless steel, mild steel, tool steel
- Pros: Fast, precise, minimal maintenance
- Applications: Industrial marking, barcodes, logos, serial numbers
- CO₂ lasers (10.6 µm): Bare steel strongly reflects CO₂ wavelengths, so direct marking is inefficient. However, with a metal marking spray (e.g. CerMark, Enduramark, LaserBond), you can bond a thin layer to the steel and then laser it, effectively leaving a visible mark without deep material removal.
- Wavelength: ~10,600 nm
- Not ideal for metal unless coated
- Use case: Only if steel has a marking agent or surface coating
- Diode lasers / lower power lasers: Often struggle to mark steel directly, but can sometimes produce oxidation marks or work when using marking sprays. Many users report success using sprays or chemical pretreatments.
- Wavelength: ~ 1064nm
3. Best Techniques to Laser Marking Steel
- Laser engraving / etching: Material is removed to form a depression or recess. Deep marks are durable, but for steel, engraving may disturb the surface integrity or protective layers—especially on stainless steel.
- Laser Engraving
- Removes material with high laser power and slow speed
- Great for industrial and heavy-duty parts
- Laser Etching
- Less aggressive than engraving
- Used for labels, QR codes, or logos
- Laser Engraving
- Laser annealing (oxidation / color change): The laser heats the metal surface (or just beneath the surface) to trigger oxidation or microstructural color changes. No material is removed. This is especially preferred for stainless steel, as it retains the protective chromium oxide layer.
- Creates a dark black mark without material removal
- Ideal for stainless steel
- Laser bonding / additive marking: A marking compound is applied to the surface, and the laser bonds it to the metal. The compound remains as the mark, without ablating the base metal. This method is useful with lasers that wouldn’t otherwise mark the metal (e.g. CO₂ lasers).
- Carbon Migration
- Causes carbon in stainless steel to rise and darken
- Creates rich, black marks—commonly used in medical and food-grade tools
For many steel applications, a hybrid approach (annealing + shallow engraving or bonding) yields the best tradeoffs of readability, durability, and surface integrity.
Preparatory Steps & Best Practices
Getting good results begins well before firing the laser.
1. Surface Cleaning & Preparation
Impurities, oxidation, oil, grease, or rust can severely degrade mark quality:
- Clean with alcohol (ethanol, isopropanol) or industrial degreasers to remove oils/dust
- If rust or scale is present, gently remove with fine sandpaper or abrasive media prior to marking.
- For highly reflective surfaces, a light roughening (fine abrasive grit) can help the laser “catch” the surface.
- Ensure part is flat or held rigidly (fixturing) so it doesn’t shift during marking.
2. Fixturing, Alignment, and Focus
- Secure the workpiece to prevent movement, vibration, or drift.
- Use a Z‑axis / focus control or auto-focus features (if your system supports it).
- If your marking area is non‑flat (curved surfaces), consider 3‑axis or dynamic focus lasers.
- Sometimes marking is done slightly out of focus (defocusing) to widen the spot size and reduce energy density for annealing modes.
3. Assist Gases
Using gases like nitrogen or oxygen can improve mark contrast, blow away debris, or control oxidation:
- Nitrogen (inert): Prevents oxidation during marking, especially helpful in engraving/ablating modes.
- Oxygen: In some cases, oxygen can enhance contrast by promoting oxidation, but must be used carefully.
- Air: In many setups, just compressed air is used.
Use the gas nozzle to direct the gas flow close to the laser spot, but without interfering with the beam.
Parameter Settings & Process Control
The “magic” of good laser marking lies in selecting the right combination of parameters: power, speed, pulse (for pulsed lasers), frequency, repetition rate, line spacing, number of passes, and focus.
1. General Principles
- Start with conservative settings; gradually increase energy (power or slower speed) until a clean, readable mark appears without damaging the surrounding area.
- Keep track of test results in a log (material, parameters, result) for future referencing.
- Use multi‑pass strategies: lighter passes repeated may yield better control than a single aggressive pass.
- Avoid overheating or melting; excessive heat can cause distortion, burrs, or surface damage.
2. Typical Parameter Ranges & Strategies
Depending on your laser, you might try:
- Annealing mode (color change): Work out of focus to spread the energy, use low speed, and avoid ablation. On stainless steel, black marks typically emerge when temperatures ~200–300 °C are reached.
- Engraving / etching: Focused spot, higher energy density, faster speed but multiple passes.
- Line spacing / hatch overlap: For raster marking, choose line spacing or hatch overlap that ensures continuous coverage without gaps.
- Pulse frequency / peak power (for pulsed lasers): Adjust to control depth and thermal input.
For example, many practitioners on forums report using high power, lower speed, and multiple passes to darken stainless steel marks, experimenting with defocus offsets (e.g. +2–3 mm out of focus) to fine‑tune contrast.
3. Marking Complex Data: Text, Codes, Logos
- For data matrix codes, barcodes, or serialized data, maintain consistent line widths and contrast.
- Use vector marking (line-by-line) or raster marking depending on your software/hardware.
- Calibration and sample marking are vital: test codes and scan them to confirm readability. Macsa ID, for example, achieves data matrix coding on steel in ~2 seconds.
Special Challenges & Tips for Stainless Steel
Stainless steel introduces unique constraints due to its protective chromium oxide layer and corrosion resistance.
1. Why You Should Avoid Deep Engraving on Stainless
Removing the chromium oxide layer via engraving or deep etching exposes raw steel, which can yield corrosion and reduce part longevity.
Laser annealing, by contrast, modifies the surface chemically without removing the oxide layer, preserving corrosion resistance.
2. Using Laser Annealing
- Because no material is removed, the surface remains intact.
- Effective black marking is possible with precise temperature control.
- The tradeoff is slower marking speeds and potential fuzzy edges for small elements if done out of focus.
- Some modern laser systems (e.g. Trotec SpeedMarker) allow annealing in focus, increasing speed and sharpness.
3. Color / MOPA Marking
Using MOPA fiber lasers, you can produce colored marks (e.g. hues of gold, blue) by tuning pulse characteristics. This is more advanced and often used for decorative or branding purposes, not purely industrial marking.
4. Hybrid Approaches
Some operations combine a light engraving plus annealing overlay to get both depth and surface color. Or they may use laser bonding for contrast with minimal mechanical effect.
Using Marking Sprays / Coatings (When Necessary)
Especially when your laser system is not ideally suited to steel (e.g. a CO₂ laser or lower-power diode), marking sprays or ink compounds can help.
1. How Marking Sprays Work
A thin layer of marking compound (such as CerMark, Enduramark, LaserBond) is applied to the steel. During lasing, the heat fuses the compound to the metal, producing a dark or contrasting mark. The base metal may remain untouched (additive marking) or slightly altered below.
Marking sprays allow lasers that cannot otherwise interact with bare metal to produce readable marks.
2. Best Practices with Sprays
- Apply a uniform, thin coat; avoid blobs or runs.
- Let the coating dry (or cure) per manufacturer instructions.
- In test runs, start with moderate power to avoid burning off the coating prematurely.
- After marking, clean off unbonded residue carefully (e.g. mild brushing, solvent rinse).
Some users prefer certain sprays for specific metals. For instance, one forum commenter asserted:
“Cermark Ultra or LMM‑6000 … laser bond works great too … I have LMM‑6000 and LaserBond … you don’t use much, just a really thin layer.” Reddit
Another user noted that Brilliance laser inks are easier to clean than Cermark. Reddit
Note: the resulting mark is less “deep” than an engraving but often fully sufficient for identification, branding, or traceability.
Post‑Processing & Quality Assurance
Once your mark is made, the job is not quite done.
1. Cleaning & Residue Removal
- Remove residual spray or debris with water, mild solvents, or brushes (depending on material compatibility).
- Be careful not to damage or scratch the mark.
- Inspect visually and with optical magnification (if available).
2. Verification & Testing
- For codes or serialization, scan DataMatrix, QR, or barcodes to confirm readability.
- Check contrast, edge quality, and uniformity.
- Check durability: perform scratch tests, chemical resistance (if relevant), or wear cycles.
3. Optional Protective Coatings
In some cases, one might apply a transparent protective coating (e.g. clear lacquer, epoxy, or passivation) to shield the mark from oxidation, wear, or environmental exposure. Test for compatibility (e.g. thermal expansion, adhesion).
Troubleshooting Common Issues
| Issue | Possible Causes | Remedies / Tips |
|---|---|---|
| Faint or unreadable mark | Energy too low, speed too fast, defocused | Increase energy (power or slower speed), reduce defocus, consider multiple passes |
| Blurred or fuzzy edges | Excessive heat diffusion, defocus too large | Use sharper focus, reduce line spacing, shorten pulse duration (if adjustable) |
| Overheated surface or melting | Energy too high or dwell time too long | Lower power, increase speed, reduce overlap or number of passes |
| Chipping or spatter | Excessive ablation, wrong gas delivery | Use inert gas assist, reduce power, or switch to annealing mode |
| Corrosion or discoloration (on stainless) | Engraving removed protective layer | Switch to annealing or gentle marking mode to preserve the chromium oxide layer |
| Inconsistent contrast across area | Uneven focus, variation in material, surface contamination | Re-level part, clean better, ensure uniform beam path and focal plane |
Forums and practical user experience are a rich resource. Many laser users recommend iterative testing and parameter logging to refine successful settings for each steel type.
Common Applications of Laser Marked Steel
- Automotive parts
- Medical devices
- Food-grade equipment
- Industrial tools
- Promotional items
- Military and aerospace components
Each of these industries values laser marking for its precision, permanence, and traceability
Practical Examples & Application Scenarios
Example 1: Marking Mild Steel Nameplates
- Clean the surface.
- Use a fiber laser (e.g. 20–50 W).
- Choose annealing or shallow etching mode.
- Set moderate power, slower speed, multiple passes, hatch fill.
- Use nitrogen assist to reduce oxidation.
- Inspect and scan codes.
Example 2: Stainless Steel Surgical Instrument Traceability
- Because corrosion resistance is critical, opt for laser annealing (no material removal).
- Use a fine raster pattern, defocused or in-focus based on system.
- Confirm permanent black marks without damaging the chromium layer.
Example 3: Using a CO₂ Laser with Marking Spray
- Clean steel and apply a marking spray (e.g. CerMark).
- Let it dry.
- Use laser rastering to fuse the coating into a visible mark.
- Clean off residue.
- This method enables marking on steel even with lasers that can’t mark bare metal.
Is Laser Marking Steel Safe?
Yes—when proper safety protocols are followed:
- Wear laser safety glasses
- Ensure the machine is enclosed
- Use proper ventilation or fume extraction
- Follow local laser safety regulations
Why Choose Laser Marking Over Traditional Methods?
| Traditional Methods | Laser Marking |
|---|---|
| Mechanical wear | Non-contact (no tool wear) |
| Slower speeds | Ultra-fast processing |
| Limited detail | High-resolution graphics |
| Frequent maintenance | Minimal upkeep |
Laser marking steel offers more durable, precise, and consistent results than etching, stamping, or mechanical engraving.
Conclusion
Laser marking steel is a powerful and flexible method for permanent identification across multiple industries. By choosing the right laser, using optimal settings, and applying the correct marking technique, you can produce professional-grade results every time.
Whether you’re marking a single item or thousands of parts per hour, laser technology scales with your needs—offering efficiency, quality, and unmatched precision.
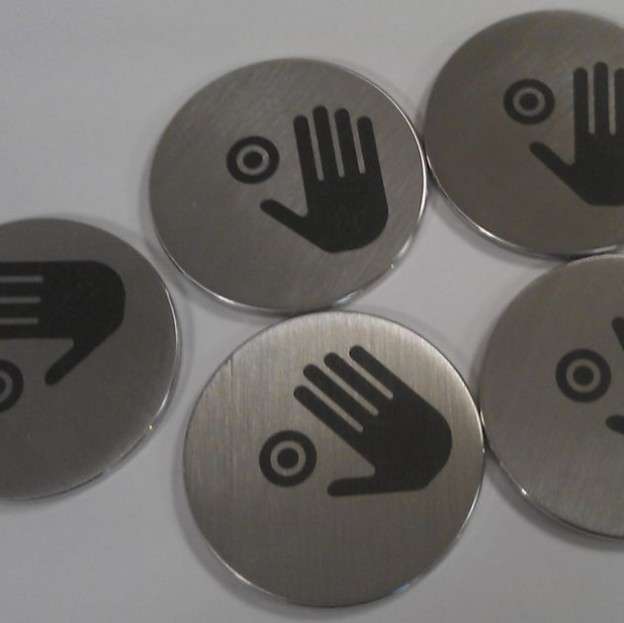
Best Settings for Steel Laser Marking on our inhouse machines


The laser that was used in the production of these pieces was our in house 70watt SPI EP-Z fibre Laser unit. The system was fitted with a Scanlab scanhead and a f-255mm f-theta lens. The laser setup and marking parameters were as follows: –
| Wavelength / laser type | 1070nm 70watt EP-Z Laser |
| Power | 80 |
| Speed | 320 |
| Pulse frequency / repetition rate | 70 KHz |
| Fill spacing / hatch / raster resolution | 0.75 @ 45/135 Degrees |
| Passes | 1 |
Need Laser Marking Services or Laser Machines
At Thinklaser we specialize in steel laser marking services and provide state-of-the-art laser systems for businesses of all sizes.
If you would like further information on How to Laser Mark Steel or any other material. Please either visit our Case Studies page, request a call back or talk to one of our laser marking specialists by going to our contact page – link below.
Contact Us for Laser Engraving, Marking & Cutting Advice (thinklaser.theprogressteam.com/)